
SEO title: DKIM for Gmail: Your Step-by-Step Setup Guide
Meta description: Learn how to set up DKIM for Gmail and Google Workspace, publish the right DNS record, verify authentication, and fix common errors that hurt deliverability.
Suggested URL slug: dkim-for-gmail
Primary keyword: DKIM for Gmail
Secondary keywords: Google Workspace DKIM, Gmail DKIM setup, DKIM record Gmail, email authentication, Gmail deliverability, DKIM selector, DNS TXT record, DMARC and DKIM
Email campaigns often fail for a frustrating reason. The copy is solid, the list is clean, and the mailbox still lands in spam or gets filtered harder than expected.
A missing or broken DKIM setup is one of the first things to check. For any team sending through Gmail or Google Workspace, DKIM for Gmail is a baseline control. It proves that outgoing mail was authorized by the domain and that the signed parts of the message weren't altered in transit.
Quick Answer and Core DKIM Definitions
A common failure looks like this. Google Workspace is sending mail, the DNS record exists, and yet the message still shows dkim=fail or no signature at all. In nearly every case, one side of the setup was done and the other was not.
Quick answer: DKIM for Gmail requires three actions. Generate the DKIM key in Google Workspace, publish the matching DNS TXT record at your domain host, then turn on signing in the Google Admin console after DNS has propagated.
Google and DNS each handle a different part of the job. Google signs the message with the private key. DNS publishes the public key that mailbox providers use to verify that signature. If the selector is wrong, the TXT record is malformed, or signing was never enabled, the record can exist in DNS and DKIM can still fail.
A clean setup path looks like this:
- Generate a DKIM record in Google Admin. Google provides the selector, DNS host name, and TXT value.
- Publish the TXT record in DNS. Your DNS provider makes the public key available for lookup.
- Start DKIM signing in Google Workspace. After DNS is live, Google begins attaching a DKIM signature to outgoing mail.
If you want the bigger picture around SPF, DKIM, and DMARC working together, this email authentication guide gives the full framework.
What DKIM means
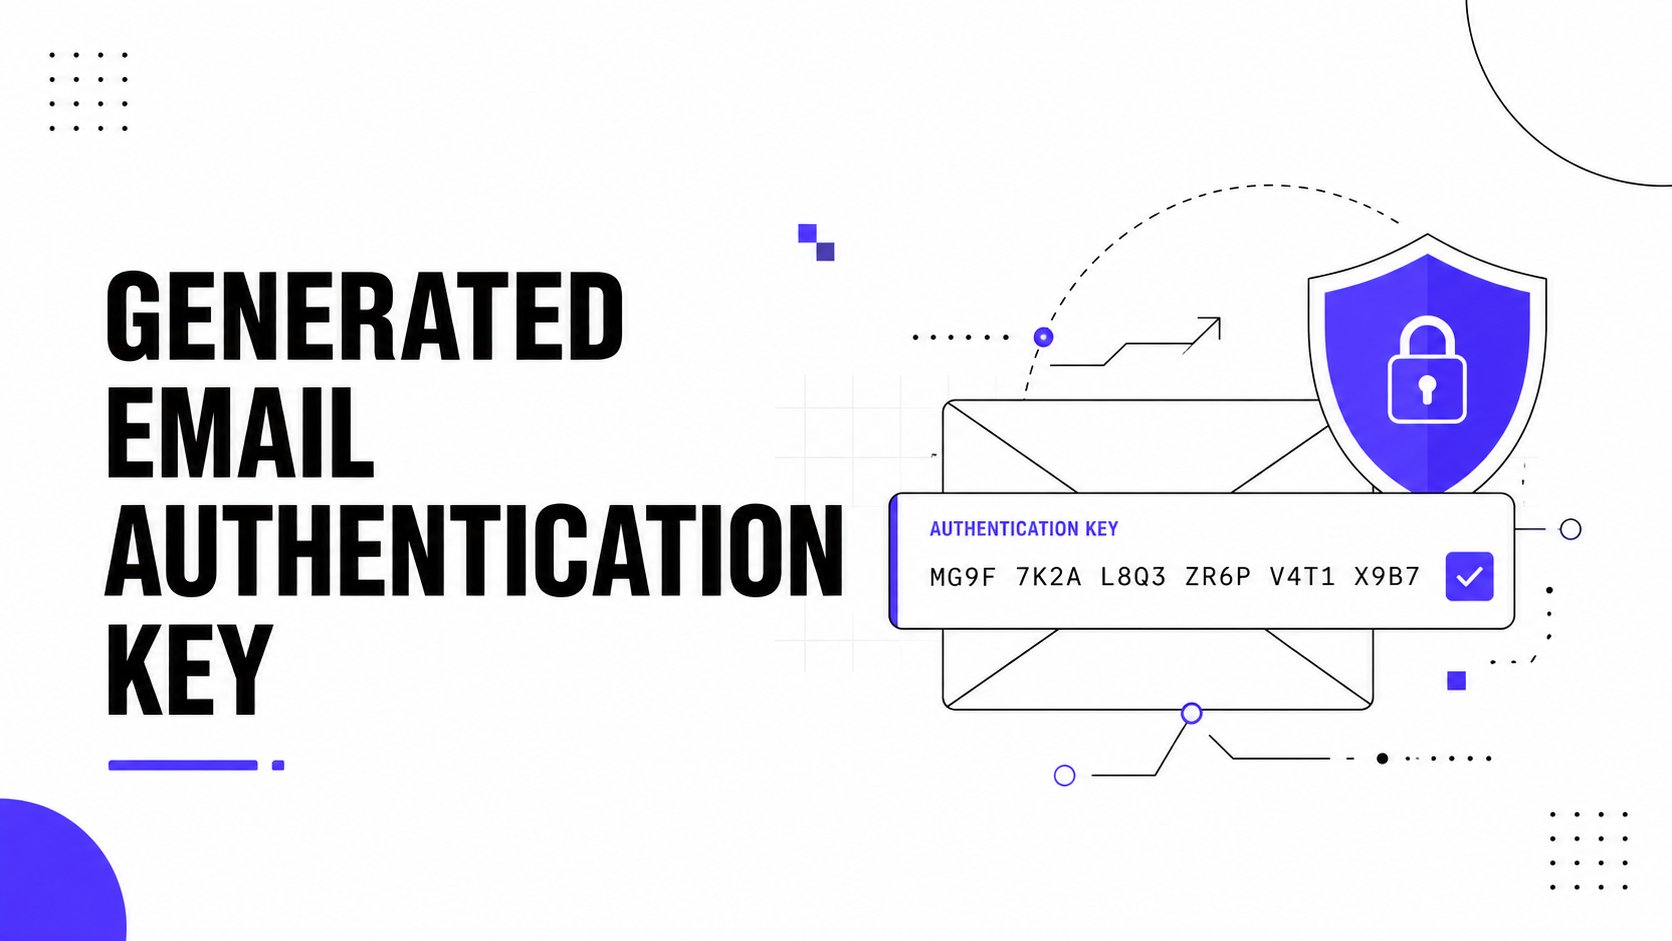
DKIM stands for DomainKeys Identified Mail. It adds a cryptographic signature to each outgoing message so the receiving server can check two things: the email was authorized by the sending domain, and the signed parts of the message were not altered after Google sent it.
That definition sounds abstract until you inspect a real header. Once you do, DKIM stops being a theory and becomes a practical pass or fail check that directly affects how providers evaluate your mail.
What a selector is
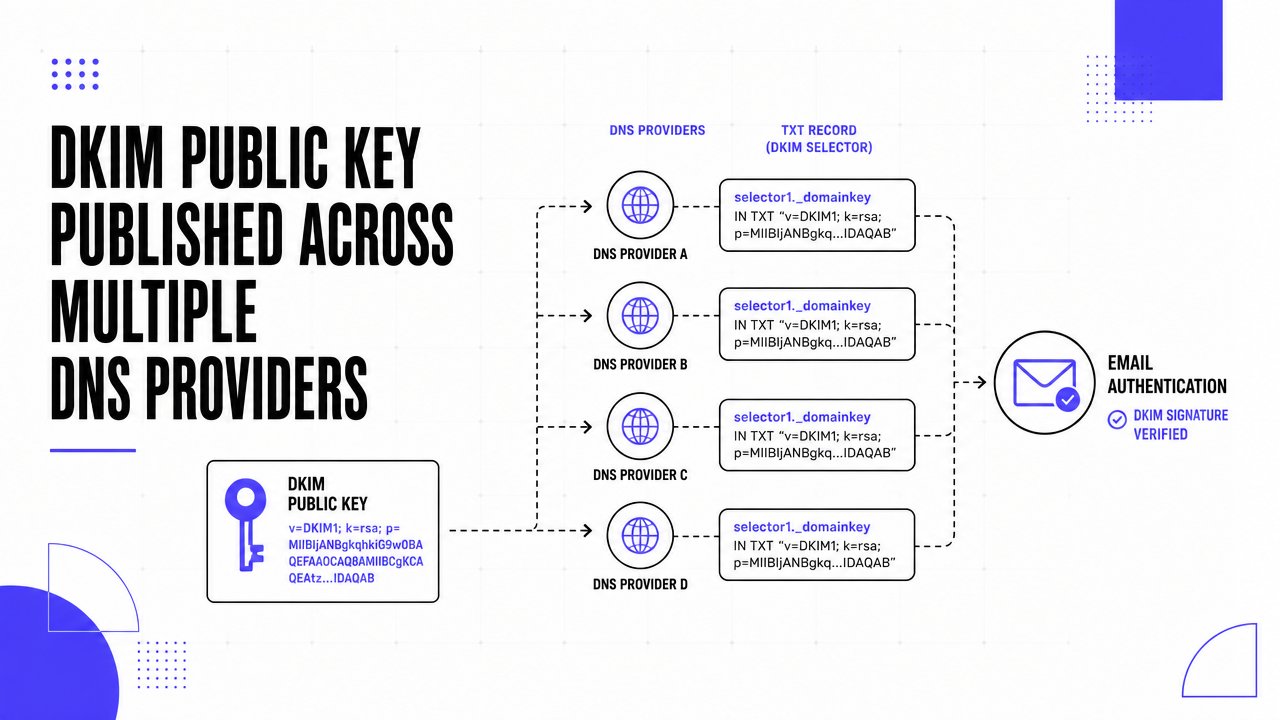
A selector is the part of the DKIM setup that tells the receiving server which public key to retrieve from DNS.
That matters for day-to-day operations. A company can sign mail from Google Workspace with one selector, use another selector for a support platform, and rotate keys later without replacing every existing record at once. If the selector in the message does not match the selector published in DNS, verification breaks even if the key itself is valid.
What the DKIM signature does
The DKIM signature sits in the email headers, usually as a DKIM-Signature field. During verification, the receiving server reads the signing domain and selector from that header, fetches the public key from DNS, and checks whether the signed headers and body still match what was originally sent. If they match, DKIM passes.
Practical rule: Do not stop at “the TXT record exists.” Check a delivered message header and confirm Gmail is actually signing mail with the selector you published.
Why DKIM for Gmail Is Non-Negotiable
DKIM for Gmail matters because email providers don't judge a message by copy alone. They judge whether the sender looks legitimate, whether the domain is behaving consistently, and whether the message can be trusted.
When DKIM is working, it acts like a technical seal. It tells the receiving side that the message was signed by an authorized sender for that domain. That doesn't guarantee inbox placement on its own, but it removes a major trust problem that often hurts legitimate senders.
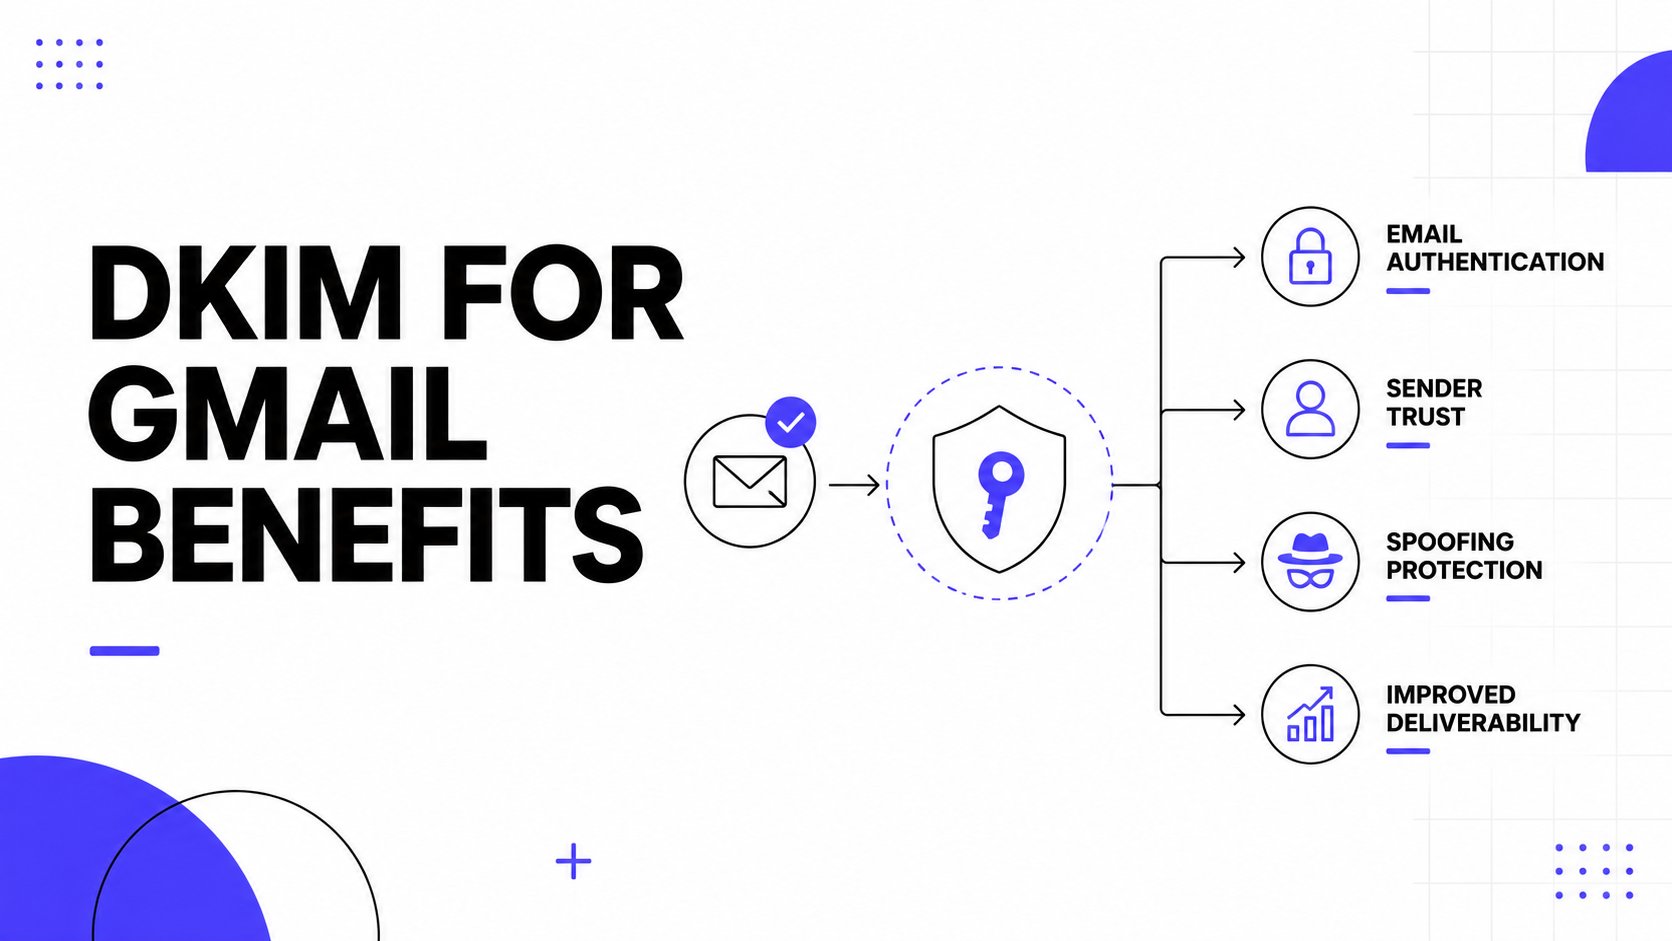
It supports sender trust
A domain without DKIM looks incomplete. For founders, outbound teams, recruiters, and agencies, that creates unnecessary risk. A properly signed message gives Gmail and other providers a stronger basis for trusting that the domain is sending what it claims to send.
That trust matters beyond Gmail too. Once a sender starts using multiple tools, forwarding paths, or different sending streams, authentication becomes the common language that holds the setup together.
It makes spoofing harder
Brand impersonation is no longer a problem only for large companies. Smaller businesses get spoofed too, especially if they use recognizable founder names, hiring aliases, or support addresses.
DKIM helps by tying mail to an authorized signing domain. If someone tries to fake the brand from outside the approved setup, the receiving side has a clearer signal that something is off.
A domain that doesn't authenticate its mail makes life easier for impersonators and harder for legitimate senders.
It prepares the domain for stronger policy controls
DKIM is also a practical prerequisite for DMARC. Without DKIM in place, DMARC has less to work with, and domain owners have less control over how receivers should treat suspicious mail.
That matters for any business that wants to move from basic setup to actual policy enforcement. The sequence is usually straightforward:
- First, authenticate mail: Make sure the domain can sign messages consistently.
- Then, validate alignment: Check that the visible sending identity and the authenticated identity make sense together.
- After that, enforce policy carefully: Use DMARC to tighten control once the sending environment is stable.
A lot of deliverability issues start because teams jump into campaigns before they finish authentication. DKIM is one of those controls that feels invisible until it breaks. Then it becomes the first place to look.
Generating Your Google Workspace DKIM Key
A common failure point happens before DNS. A founder generates a DKIM record in Google, hands it to whoever manages the domain, and the team later discovers they copied the wrong selector, chose a weak naming convention, or generated a new key without realizing it would affect the old setup. The key generation step is quick. Getting it right saves cleanup later.
Google Workspace lets admins generate a DKIM key pair for each sending domain. Google keeps the private key and uses it to sign outgoing mail. You publish the matching public key in DNS so receiving servers can verify that signature.
Where to generate the record
Open the Google Admin Console for the correct Workspace account, go to Gmail authentication for the domain you send from, and generate a new DKIM record there. This matters more than it sounds. Teams with multiple domains or aliases often generate a key for the primary domain, then wonder why mail from a different branded domain is not aligning cleanly.
Use the exact domain that appears in live sending, not the one that is merely convenient in the admin panel.
What to decide before you click generate
Two choices affect how easy this setup will be to maintain.
- Key length: Use 2048-bit if your DNS provider accepts it. That is the better long-term choice for security and standard setup. Some DNS providers or older DNS configurations still create friction with longer TXT values, so 1024-bit may be the fallback in those edge cases.
- Selector name: Choose a selector you can recognize later, such as one tied to Google Workspace, a date, or a clear rotation label. Avoid vague names like
defaultif the domain also sends through other platforms.
The selector is not just a technical field. It becomes part of your operating history. When a team later rotates keys, audits vendors, or compares signatures across systems, a clean selector saves time and reduces mistakes. If you want the full authentication picture around DKIM, SPF, DMARC, and BIMI, this guide to setting up DKIM, SPF, DMARC, and BIMI together helps frame the dependencies.
What Google gives you
After generation, Google returns the exact values you need to publish.
| Item | What it means | Why it matters |
|---|---|---|
| Selector | The label that identifies this DKIM key | Receiving servers use it to find the right DNS record |
| Host name | The DNS name for the TXT record | Some DNS providers want the full host, others only the left-hand label |
| TXT value | The public key and DKIM parameters | Any missing characters or formatting errors can break verification |
Real-world setup diverges from Google's clean instructions. DNS dashboards do not all behave the same way. Some auto-append the domain. Some split long TXT values visually but still save them correctly. Some reject pasted quotation marks or hidden spaces copied from chat tools and ticket systems.
Practical handling tips before DNS publication
Copy the values exactly as Google shows them first. Then adapt only the host field to match your DNS provider's format.
A few habits prevent rework:
- Save the selector in your internal documentation before anyone edits DNS.
- Paste the TXT value into a plain text editor first if it came through Slack, email, or a project management tool.
- Confirm whether your DNS provider expects the full hostname or only the selector portion.
- Avoid generating a second key casually. If multiple admins are working at once, version confusion starts fast.
The goal at this stage is simple. Leave Google with one clean selector, one correct public key, and a clear record of which domain that key belongs to.
Publishing Your DKIM Record with Common DNS Providers
A lot of DKIM setups break at the DNS screen, not in Google Workspace. The record Google gives you is usually correct. The problem is how your DNS provider expects you to enter it.
DNS panels use different labels, different defaults, and different formatting rules. One provider wants only the left-hand host label. Another automatically appends your root domain. Another displays a long TXT value across multiple lines, which looks wrong but publishes fine. That gap between Google's clean instructions and real DNS behavior is what causes delays.
The record itself is simple:
- Type:
TXT - Host or Name: the selector-based DKIM hostname Google generated
- Value or Content: the full public key string from Google
- TTL: the default is usually fine
The practical part is getting the host field right.
If Google gives you a host like google._domainkey.example.com, some providers want that full name. Others want only google._domainkey because they append example.com automatically. Enter the full domain in a panel that auto-appends the root, and you end up publishing google._domainkey.example.com.example.com. The record saves successfully, but Gmail cannot find it.
Here is how that usually plays out across common providers:
Cloudflare often works best with the host entered relative to the zone, such as google._domainkey.
GoDaddy commonly expects the host portion without repeating the root domain.
Namecheap usually separates the fields clearly, but copy-paste issues are common, especially if the TXT value came from email, chat, or a ticketing system.
A quick check before you click save prevents most failures:
- Confirm you are creating a TXT record, not a CNAME.
- Check whether the provider auto-appends the domain.
- Paste the DKIM value as one continuous string unless the provider specifically formats it for you.
- Make sure there is only one TXT record for that selector.
- Give DNS time to propagate before treating the setup as broken.
I also recommend testing the exact hostname independently in your DNS provider after saving. Look at the final stored record, not just the form you submitted. If the provider rewrote the host, added quotes oddly, or split the value in a way that changes the content, you catch it early.
Teams that are setting up the full authentication stack at the same time should use a single checklist for DKIM, SPF, DMARC, and BIMI setup. It reduces the odds of fixing DKIM while leaving another DNS issue in place.
The goal here is not just to publish a record. It is to publish a record that resolves exactly where Google's selector expects it, with no formatting surprises.
Enabling and Verifying DKIM in Your Google Admin Console
A common failure point happens right here. The TXT record is live, everyone assumes DKIM is done, and Google still is not signing mail because authentication was never started in Admin Console.
After DNS is in place, go back to the DKIM settings for the domain in Google Admin and start authentication for that selector. If Google can read the public key and the selector matches, Workspace begins signing outgoing mail with the private key tied to that record. If the button fails or the status does not change, treat that as a validation problem, not a vague Google delay.
Turn on signing in Google Admin
Open the domain's DKIM settings, confirm you are looking at the same selector you published in DNS, then click Start authentication. This step matters more than many teams expect. Publishing the record only makes the key available. Google still has to be told to use it.
Once enabled, the status in Admin Console should show that Gmail is authenticating mail with DKIM. If it does not, check the selector first. I see more failed activations from a selector mismatch than from broken key values.
Verify on a real message
Admin status helps, but the real test is a signed message that lands in a mailbox. Send a fresh email from the Google Workspace domain to a separate Gmail inbox your team controls. Open the message, click Show original, and read the authentication results in the header summary.
You want to see DKIM=pass or DKIM=OK.
If Google says signing is active but the message does not pass, verify two things in parallel. First, inspect the message headers to confirm which domain and selector signed the message. Second, run the published record through a DKIM record checker for Gmail domains to confirm the public key is visible exactly where receivers expect it.
What a successful verification confirms
A passing result tells you three practical things:
- Google Workspace is signing outbound mail for that domain
- receiving servers can fetch the public key from DNS
- the signature survives delivery and validates against the message content
That last point matters. A visible TXT record alone does not prove mail is protected. A passing message does.
For teams sending newsletters, outbound sales sequences, or account emails from the same Workspace domain, verify more than one message type before calling the setup finished. Different tools and aliases can route through different paths, and DKIM problems often show up there first.
Troubleshooting Common DKIM for Gmail Errors
Most DKIM failures come from a small set of issues. The frustrating part is that they often look similar at first glance. A failed status in Google, a missing record in a lookup tool, or a Gmail header without a pass result can all trace back to different causes.
The fastest way to troubleshoot DKIM for Gmail is to diagnose by symptom, not by guesswork.
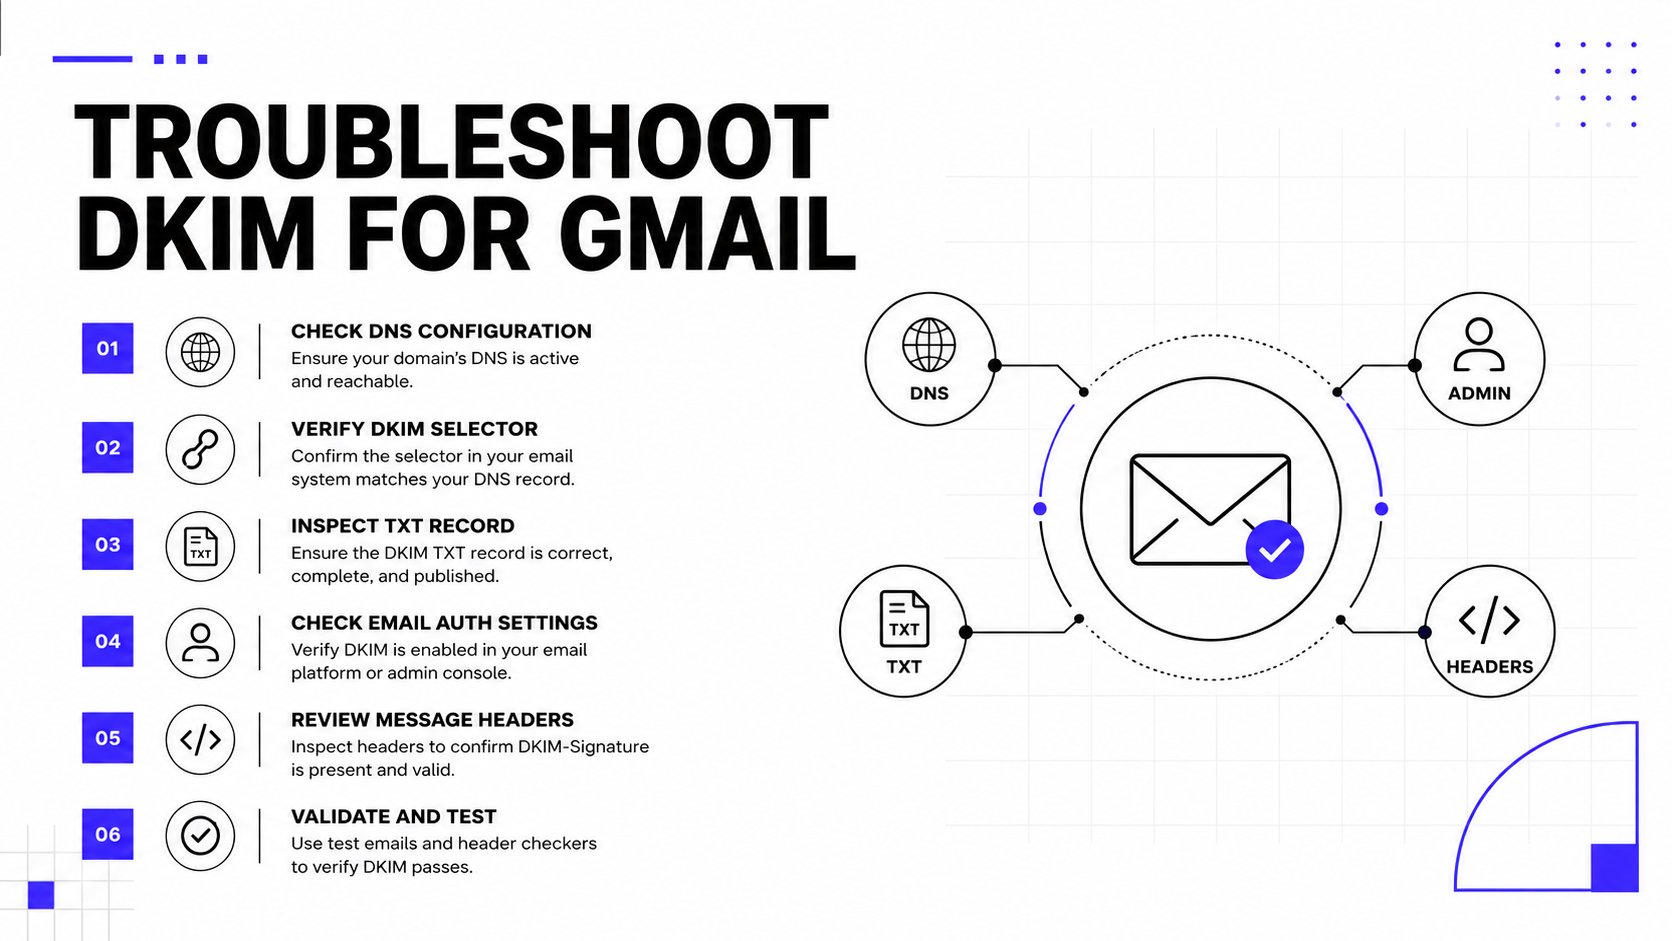
If Google won't start authentication
This usually means Google can't find or validate the DNS record yet.
Likely causes:
- Propagation delay: The record may still be spreading across DNS.
- Wrong host value: The selector or host name may have been entered in the wrong format.
- Record type mismatch: The record might not be a TXT entry.
What to do:
- Recheck the host and value against what Google generated.
- Confirm the DNS dashboard didn't auto-append the domain unexpectedly.
- Give the record more time if it was only recently published.
If the record exists but Gmail doesn't show DKIM pass
This is a different class of problem. DNS may be present, but the signature still isn't validating on actual mail.
| Symptom | Likely cause | Direct fix |
|---|---|---|
| No DKIM result in Show original | Signing may not be enabled in Google Admin | Start authentication again after confirming DNS |
| DKIM result is not passing | Selector mismatch between Google and DNS | Make sure Google is using the selector tied to the published record |
| Intermittent behavior | DNS visibility may not be consistent yet | Wait and retest after propagation settles |
The most common copy mistake
The most frequent operator error is simple. A team copies the record into DNS, but the provider changes the host format or the pasted value includes extra characters.
Field note: If the setup looks right but won't validate, compare every character in the host and TXT value before changing anything more complicated.
A clean diagnostic order
- Start with DNS visibility: If the public key can't be found, nothing else matters.
- Then confirm selector alignment: Google and DNS must reference the same selector.
- After that, test a live message: Header verification is the final proof.
- Only then look for edge cases: Most issues are basic formatting or timing problems, not exotic platform bugs.
Teams often lose time by changing multiple variables at once. A better path is to hold the selector steady, verify the exact DNS record, and test again with one known mailbox.
How Mailwarm Perfects Your Email Authentication and Deliverability
DKIM is a foundational control, not a complete deliverability strategy. A domain can be authenticated correctly and still struggle if sender reputation is weak, engagement is poor, or mailbox providers don't see enough healthy activity over time.
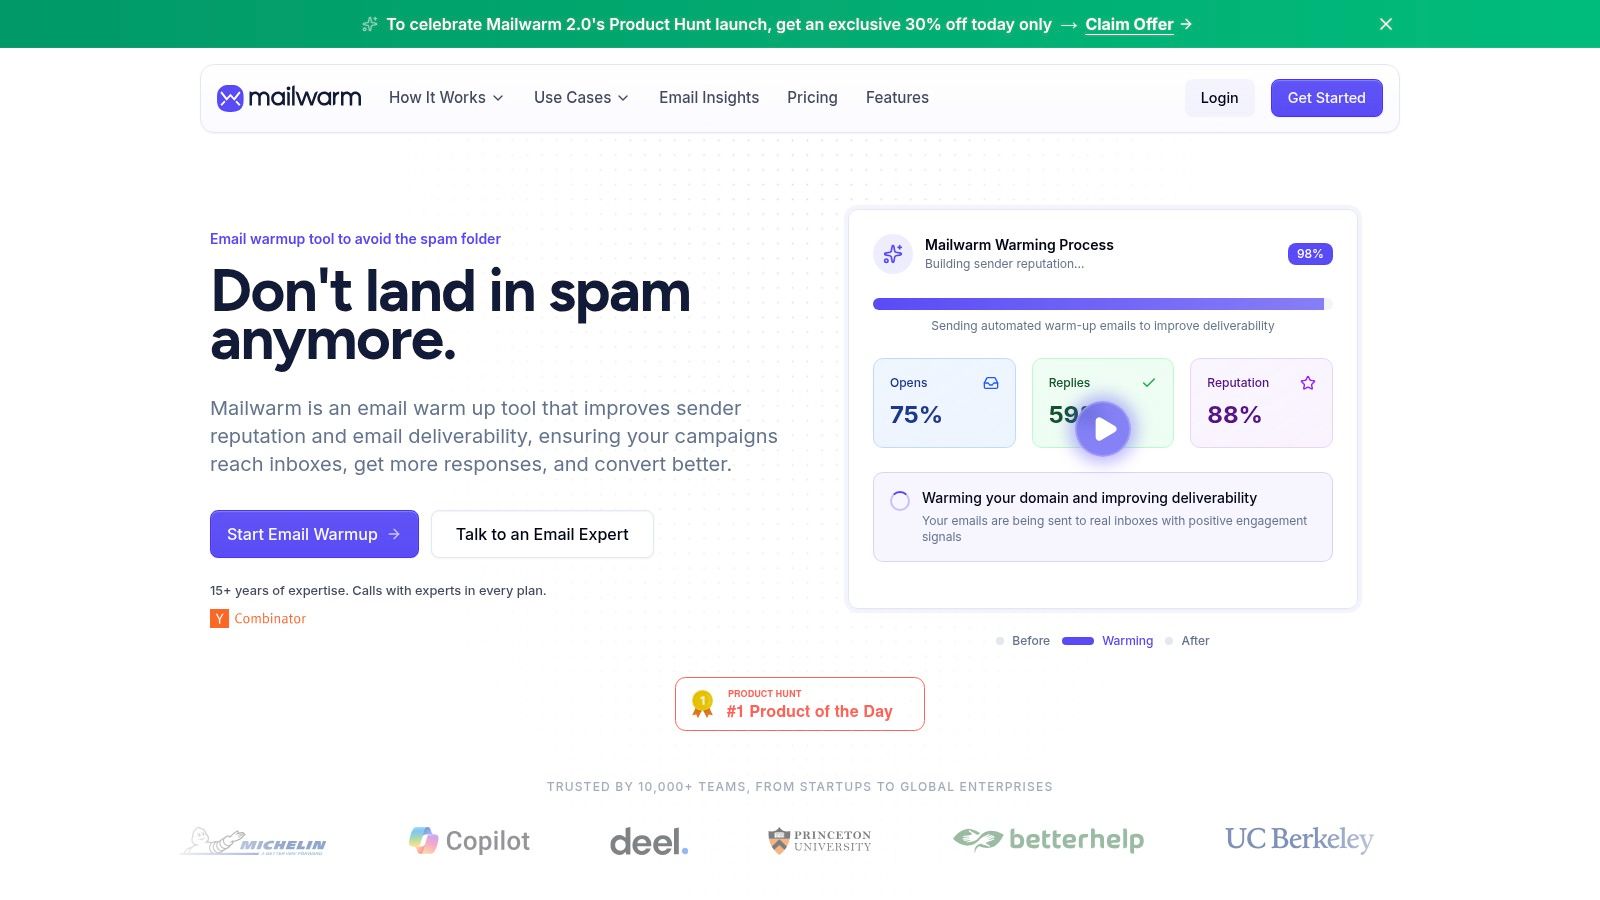
That's where a platform like Mailwarm fits. Mailwarm goes beyond basic warmup by combining warmup automation, spam score monitoring, inbox placement insights, authentication fix tools, deliverability analytics, and expert guidance. It also doesn't require IMAP access or permission to read the user's private inbox, which is a meaningful difference for teams that care about security and control.
Why authentication alone isn't enough
A technically correct setup helps a sender avoid preventable trust issues. It doesn't automatically create positive reputation signals. Teams still need consistent sending behavior, healthy list practices, and real engagement patterns that support inbox placement.
Mailwarm helps teams build sender reputation with real inbox engagement across a network of 50,000+ aged real inboxes. It supports opens, replies, threads, spam removal, and important marking. Depending on the plan, it can generate up to 100% replies to warmup emails, and every plan includes expert deliverability calls.
For teams that want additional background on broader outreach hygiene, this guide to email deliverability for outreach is a useful companion resource.
A closer look at the workflow helps:
What premium deliverability support changes
Basic warmup tools mainly automate sending patterns. Mailwarm is built for teams that care about real inbox placement, not just automated warmup activity.
That matters when the setup gets messy. A domain may have valid DKIM and still underperform because the mailbox mix is wrong, the content pattern is risky, or reputation has already slipped. Mailwarm connects authentication checks with reputation building and expert review, which is often what turns a technically valid setup into a reliable sending system.
Conclusion
DKIM for Gmail is one of the few deliverability controls that every serious sender should verify directly. If the record is generated correctly, published properly in DNS, and validated on a live message, the domain has a much stronger authentication foundation.
That still isn't the whole job. Reputation, engagement, and sending behavior matter just as much after setup. For teams comparing what comes next, this roundup of effective email warmup software can help frame the options. If email is part of the growth strategy, Mailwarm helps build sender reputation, monitor inbox placement, and reduce spam risk with expert-guided warmup.
Frequently Asked Questions About DKIM for Gmail
What is DKIM for Gmail
DKIM for Gmail means Google Workspace adds a cryptographic signature to outgoing mail, and receiving servers check that signature against the public key published in your DNS. In practice, it tells mailbox providers the message was authorized by your domain and was not altered in transit.
How do you set up DKIM for Gmail
The setup has three parts. Generate the key in Google Admin, publish the TXT record at your DNS host, then go back to Google Admin and turn signing on.
The order matters. If you enable signing before the DNS record is live, verification fails and teams often chase the wrong problem.
What key length should be used for Google Workspace DKIM
Use a 2048-bit key if your DNS provider supports it. Use 1024-bit only if the provider cannot handle the longer record.
For most businesses, 2048-bit is the right choice. The main trade-off is DNS compatibility, not deliverability strategy.
How do you verify that DKIM is working in Gmail
Send a message from your domain to a Gmail inbox, open Show original, and look for DKIM=pass. Also check that the signing domain matches the domain you intended to authenticate.
That second check matters. I often see teams pass DKIM on a subdomain or old selector and assume the whole setup is clean.
Why isn't Google Workspace finding the DKIM record
The common causes are a selector mismatch, the wrong host value, quotation marks or line-break issues in the TXT record, or DNS that has not updated everywhere yet.
DNS provider formatting causes a lot of confusion here. Some hosts want only the selector name, while others want the full hostname. If Google cannot find the record, compare the exact host format your provider expects instead of only checking whether the TXT value was pasted correctly.
How long can DKIM DNS propagation take
It can work within minutes, or it can take up to 48 hours depending on your DNS provider, TTL settings, and resolver caching.
If you are troubleshooting during that window, test from more than one DNS checker and verify the selector path itself. Waiting helps, but checking the actual record name usually finds the issue faster.
Is DKIM enough to fix deliverability problems
DKIM helps prove message legitimacy, but inbox placement still depends on domain reputation, sending patterns, complaint rates, list quality, and engagement.
A valid DKIM signature will not offset poor list hygiene or an aggressive cold outbound ramp.
Why is Mailwarm more expensive than basic email warmup tools
Mailwarm includes more than automated warmup sends. It combines real inbox engagement, reply activity based on plan level, spam score monitoring, provider-level warmup, authentication support, no IMAP access required, and expert deliverability calls in every plan.
That difference matters for teams that need help fixing the full sending setup, not just increasing send volume.
If email is part of the growth strategy, Mailwarm helps teams build sender reputation, monitor inbox placement, and reduce spam risk with expert-guided warmup, authentication support, and real inbox engagement.